
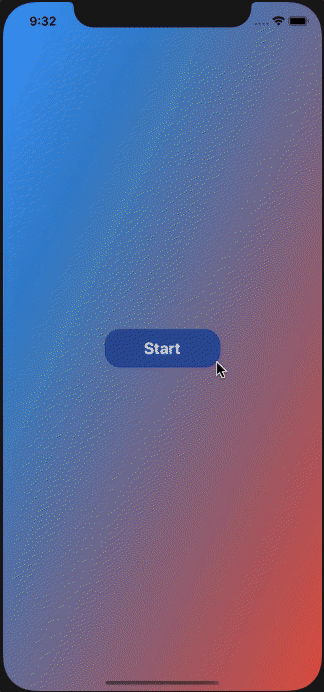
Have you ever found yourself spending a lot of time playing around with an app just because it feels cool to use? Animations are for sure the reason why this happens. This is why they are so important and it's why we need to dedicate a good amount of time in our development process to think about them.
Creating animations is one of the funniest parts of developing an app (or maybe the funniest part). It’s awesome to see what your imagination can come up with and then translate it into an actual application. Animations are also one of the key values that we need to deliver in order for our app’s users to stay engaged.
When we think about animations in Swift, we generally think about “UIView.animate” and that’s fairly enough in most cases. However, there are some scenarios in which we need more flexibility in order to achieve what we want. This is where Core Animations play their part.
In this article, we are going to learn how to create the following effects using mostly Core Animations:
First thing we need to know is that while using “UIView.animate” animates views, Core Animations animates the properties of the layer. This means that any property of the CALayer class (and subclasses) can be animated. To check all the different properties that you can customize of a CABasicAnimation, you can check Apple’s Documentation
That being said, let’s jump into it!. In the example above, you for sure noticed the background color animation. Let’s start there. First, let’s create our gradient layer and add it to the view.
let colorOne = UIColor(red: 0, green 157/255, 248/255, alpha: 1).cgColor
let colorTwo = UIColor(red: 206/255, green 7/255, 85/255, alpha: 1).cgColor
let colorThree = UIColor(red: 245/255, green 180/255, 51/255, alpha: 1).cgColor

var gradientColors = [[]]()
gradientColors.append([colorOne, colorTwo])
gradientColors.append([colorTwo, colorThree])
gradientColors.append([colorThree, colorOne])
gradientColors.append([colorOne, colorThree])

var currentGradient = 0

let gradient = CAGradientLayer()
gradient.frame = view.bounds
gradient.colors = gradientColors[currentGradient]
gradient.startPoint = CGPoint(x:0, y:0)
gradient.endPoint = CGPoint(x:1, y:1)
gradient.drawsAsynchronously = true

view.layer.insertSublayer(gradientLayer, at: 0)
Then, we need to create our Core Animation. This can be done using the initializer function:
let gradientAnimation = CABasicAnimation(keyPath: #keyPath(CAGradientLayer.colors))You may have also noticed that the CABasicAnimation initializer request passes a string as a parameter. This string corresponds to the property that you’re going to animate.
You might be thinking, why is this parameter a string instead of an enum value? Well, CoreAnimations were originally written in Objective-C and as you might know, enums are not supported as they are in Swift. However, there’s a trick that we can implement in order not to use string literals. Instead, we can use #keyPath compiler command and turn the property that we want to animate type safe. (Note that not all properties have their keyPath equivalent, there will be times when we will have no choice but to use a literal String)
Now that the initialization is completed, we can configure our animations.
gradientAnimation.duration = 3.0 // 1
gradientAnimation.toValue = gradientColors[currentGradient] // 2
gradientAnimation.fillMode = .forwards // 3
gradientAnimation.isRemovedOnCompletion = false // 4
gradientLayer.add(gradientAnimation, forKey: "gradientChangeAnimation") // 5- The duration of the animation.
- This represents the values that we are going to interpolate between. Basically, the animation that we want to get. Another property that you can set here is fromValue. If you don’t set it, then the interpolation is going to be between the current value of keyPath in the target layer’s presentation and the toValue property.
- The fill mode, in this case we set it to forwards.
- With this we assure that the animations will be start again when it ends
- We add the animation to our gradient layer.
Finally, we need the color change for when the animation completes. To do this, we need to implement the CAAnimationDelegate of our animation. Let’s also encapsulate our animation logic into a function and update the currentGradient index.
private func animateGradient() {
    currentGradient = currentGradient < gradientColors.count - 1 ? currentGradient + 1 : 0

    gradientAnimation = CABasicAnimation(keyPath: #keyPath(CAGradientLayer.colors))
    gradientAnimation.duration = 3.0
    gradientAnimation.toValue = gradientColors[currentGradient]
    gradientAnimation.fillMode = .forwards
    gradientAnimation.isRemovedOnCompletion = false
    gradientAnimation.delegate = self
    gradientLayer.add(gradientAnimation, forKey: "gradientChangeAnimation")
}

// CAAnimationDelegate
func animationDidStop(_ anim: CAAnimation, finished flag: Bool) {

    if flag {
        gradientLayer.colors = gradientColors[currentGradient]
        animateGradient()
    }
}
With this in place, we now have our background animation! Let’s now dive into the label animation. We can divide it into two separate animations, one that zooms in, stops for a little and then continues zooming in. And another one that changes the opacity when it reaches the highest zoom level.
Let’s go ahead and create the animation for the first one.
let scaleAnimation = CABasicAnimation(keyPath: "transform.scale")
scaleAnimation.toValue = 6
scaleAnimation.duration = 1
scaleAnimation.isRemovedOnCompletion = true
We are now going to see one of the most powerful features Core Animations provides. As you might know, with UIKit, there are some predefined timing functions that we can use such as easeInOut for example. However, with Core Animations, we can define custom ones.
scaleAnimation.timingFunction = CAMediaTimingFunction(controlPoints: 0.11, 0.9, 0.92, 0.13)Don't worry, you don't have to deal with this math, you can play around in the following link: https://cubic-bezier.com/. It will give you the values of your timing function once you're done.
Now that this is completed, we are now going to focus on the second one.
let opacityAnimation = CABasicAnimation(keyPath: "opacity")
opacityAnimation.toValue = 0
opacityAnimation.duration = 0.5
opacityAnimation.beginTime = CACurrentMediaTime() + 0.5 // With this line we add a delay
Having both animations implemented, let’s put the pieces together. In order to be able to show the countdown, a label, an array that holds the countdown values, and a variable that keeps the current value to display are needed.
var currentCountDownStep = -1 {
    didSet {
        if currentCountDownStep >= 0 {
            if currentCountDownStep < countDownTexts.count {
                countDownLabel.text = countDownTexts[currentCountDownStep]
                animateCountDownLabel()
            } else {
								currentCuntDownStep = -1
						}
				}
		}
}

let countDownTexts = ["Ready?", "3", "2", "1", "Go!"]

func animateCountDownLabel() {
	setupScaleAnimation()
	setupOpacityAnimation()
}

func setupScaleAnimation() {
	let scaleAnimation = CABasicAnimation(keyPath: "transform.scale")
	scaleAnimation.toValue = 6
	scaleAnimation.duration = 1
	scaleAnimation.isRemovedOnCompletion = true
	scaleAnimation.timingFunction = CAMediaTimingFunction(controlPoints: 0.11, 0.9, 0.92, 0.13)
	countDownLabel.layer.add(scaleAnimation, forKey: "ScaleCountDownAnimation")
}

func setupOpacityAnimation() {
    let opacityAnimation = CABasicAnimation(keyPath: #keyPath(CALayer.opacity))
    opacityAnimation.toValue = 0
    opacityAnimation.duration = 0.5
    opacityAnimation.beginTime = CACurrentMediaTime() + 0.5
    countDownLabel.layer.add(opacityAnimation, forKey: "OpacityCountDownAnimation")
}
The only missing part is that we need to change currentCountDownStep once the animation is completed. This needs to be done in the CAAnimationDelegate. However, we already used it for the background color animation and we don’t have a reference in the function parameters to know when the animation completed.
Well, don’t worry, we’ve a little trick for that. We can add custom properties to our animations and then retrieve them in the delegate method. In this particular case, we can add some custom “id” to our animations and perform some actions based on it.
let animationId = "id"
let gradientAnimationId = "GradientAnimation"
let scaleAnimationId = "ScaleAnimation"

gradientAnimation.setValue(gradientAnimationId, forKey: animationId)
scaleAnimation.setValue(scaleAnimationId, forKey: animationId)

func animationDidStop(_ anim: CAAnimation, finished flag: Bool) {

    guard let animation = anim.value(forKey: animationId) as? String else { return }

    if flag {
        if animation == gradientAnimationId {
            gradientLayer.colors = gradientColors[currentGradient]
            animateGradient()
        } else if animation == scaleAnimationId {
            currentCountDownStep += 1
        }
    }
}
And that's all you need. With literally three basic core animations you can achieve some pretty cool effects!
We currently live in the SwiftUI era. However, UIKit is going to be around for a few more years so adding these concepts to your skill set will for sure be of great benefit.